Testing APIs with Postman
Learn how to use the Lighthouse API Postman collection to quickly test API endpoints with your credentials in both sandbox and production environments.
What is Postman?
Postman is a powerful application for RESTful API exploration and testing. It allows you to:
- Save multiple sets of credentials as environments
- Quickly switch between sandbox and production
- Test API calls without writing code
- Inspect request and response details
- Automate API testing workflows
The Lighthouse API provides a pre-configured Postman collection with all available endpoints, complete with example requests and automatic signature generation.
Step 1: Get the Collection
Import the Collection
Click the Run in Postman button below to automatically install or open Postman and import the Lighthouse API collection:
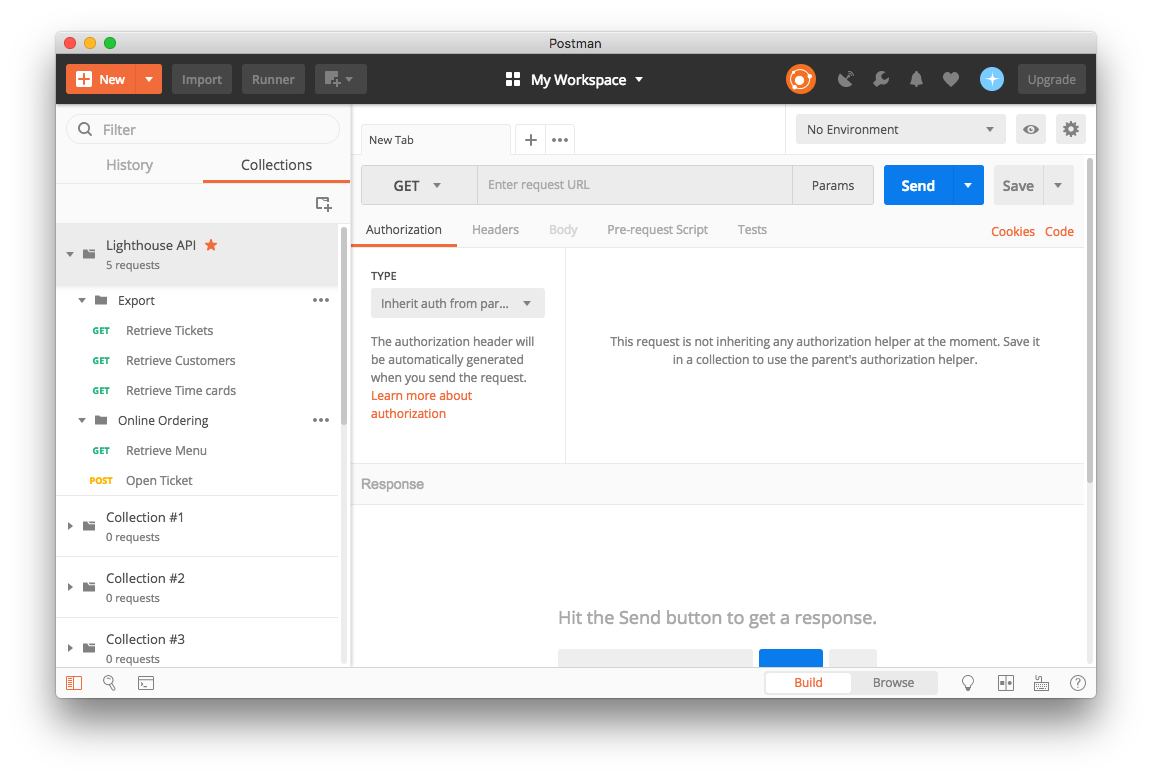
Verify Import
Once imported, you'll see the Lighthouse API collection in your Postman sidebar with all available endpoints organized by category:
Step 2: Create Environment
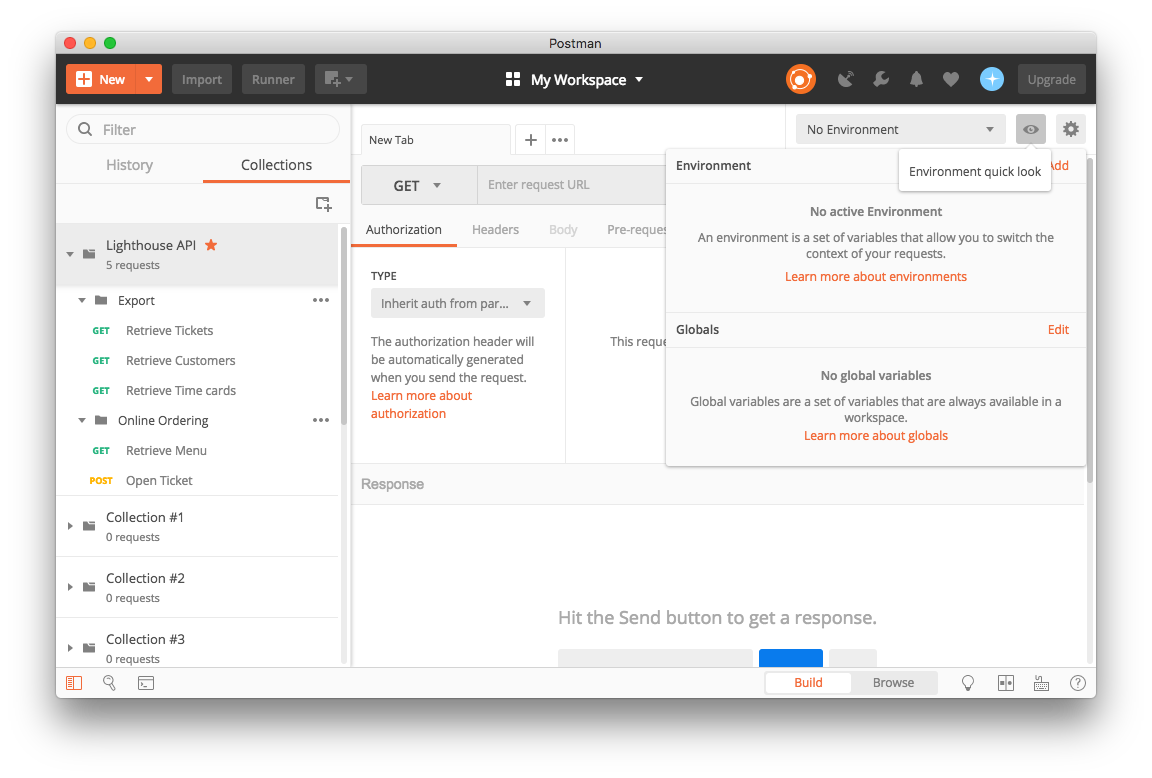
Access Environment Settings
The Postman collection uses environment variables to manage your API credentials, making it easy to switch between different environments (sandbox, production) or different merchant accounts.
- Find the eye icon in the top-right corner of Postman
- Click the Add link to create a new environment
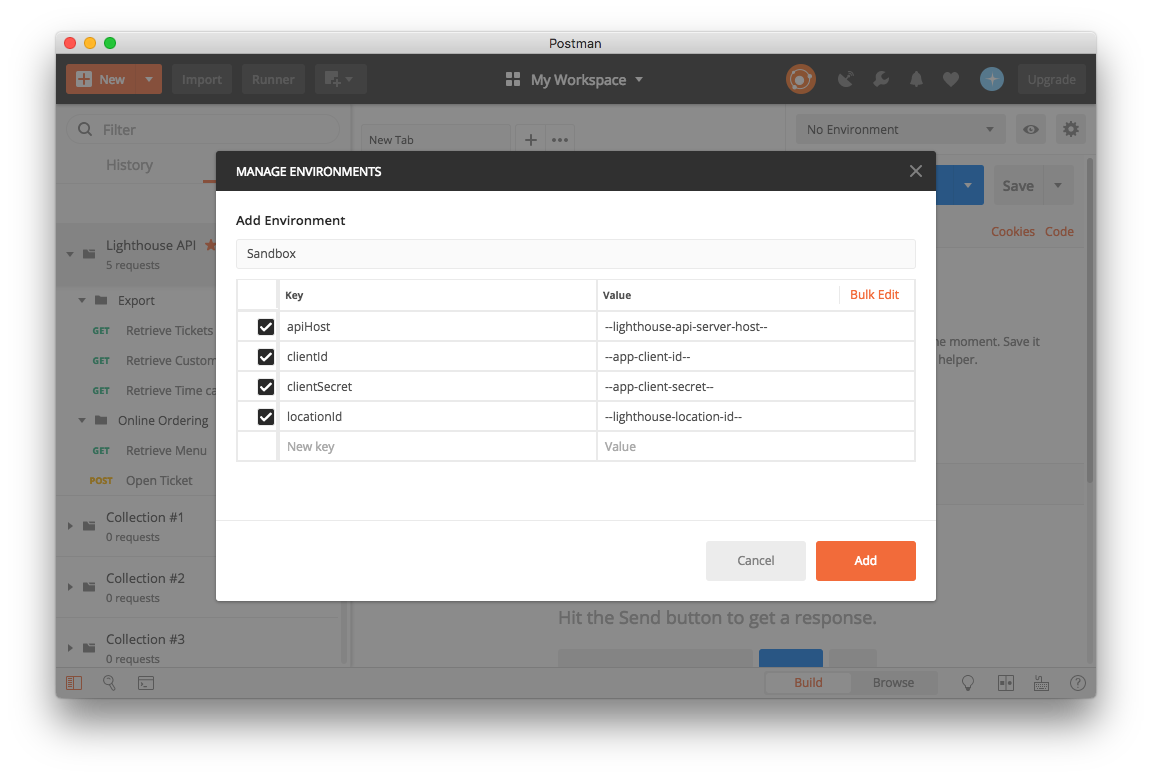
Configure Variables
Set up the following environment variables using the credentials provided when you entered the Lighthouse integration program:
- Name
apiHost- Description
The Lighthouse API service host URL
Example:
https://conecto-api.shift4payments.com
- Name
clientId- Description
Your application client ID used to authenticate with the Lighthouse API server
- Name
clientSecret- Description
Your application secret for accessing the Lighthouse API server
- Name
locationId- Description
The Lighthouse location identifier for the merchant location you're testing with
Save and Select Environment
- Click Add or Update to save your environment
- Select your new environment from the environment dropdown in the top-right corner
- The collection will automatically use these variables for all requests
Step 3: Make a Call
Execute Your First Request
Let's test the Ticket endpoint using your configured environment:
- Select an Endpoint - Navigate to the Tickets endpoint in the collection
- Review Parameters - Check that query parameters are set correctly
- Send Request - Click the Send button
The collection automatically:
- Generates the HMAC signature using your credentials
- Adds required authentication headers (
x-access-key,x-timestamp,x-signature) - Uses your environment variables for the API host and location ID
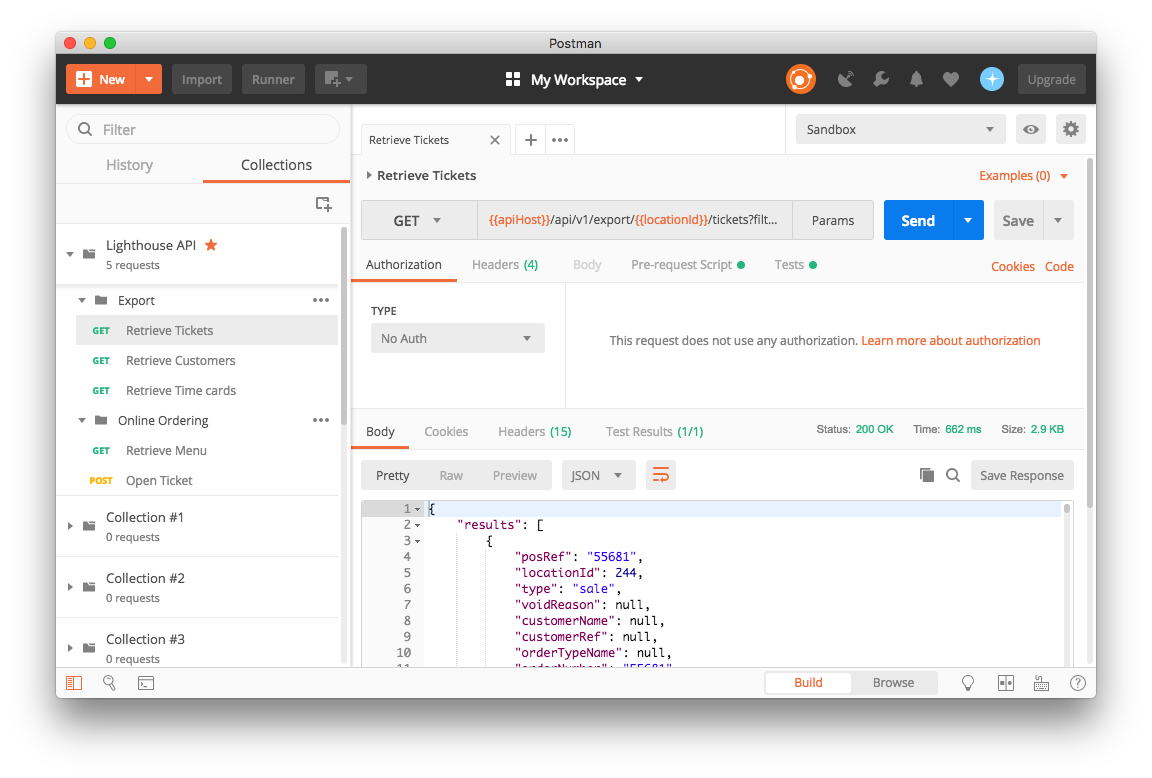
Inspect the Response
After sending your request, you'll see:
- Status Code - Indicates success (200) or error (4xx, 5xx)
- Response Time - How long the request took
- Response Body - The JSON data returned by the API
- Headers - Response headers including rate limiting information
Best Practices
- Name
Multiple Environments- Description
Create separate environments for sandbox and production credentials. This prevents accidentally calling production APIs during development.
- Name
Secure Credentials- Description
Never share Postman collections with credentials embedded. Always use environment variables for sensitive data.
- Name
Test Before Integration- Description
Use Postman to test and understand API responses before implementing in your application code.
- Name
Save Example Responses- Description
Save successful responses as examples in Postman to document expected API behavior.
- Name
Monitor Rate Limits- Description
Check response headers for rate limiting information (
X-RateLimit-Limit,X-RateLimit-Remaining) to understand your usage.
- Name
Update Collection- Description
Periodically re-import the collection to get updates to endpoints and documentation.
- Name
Use Variables- Description
Take advantage of Postman variables for dynamic values like timestamps, IDs, or calculated fields.
Next Steps
Now that you have Postman configured:
- Explore Endpoints - Test different API endpoints to understand their behavior
- Review Documentation - Check each endpoint's description and parameters in Postman
- Implement in Code - Use the Postman code generation feature to see implementation examples in various languages
- Set Up Tests - Create Postman test scripts to automate API validation
For detailed information about authentication, see the Authentication documentation.